| SaGa Scarlet Grace character | |
|---|---|
| サーシャ (Sāsha?) | |
 | |
| Gender | Female |
| Race | Human |
| Class | Traveling Woman |
| Initial Role | Spiritualist: Elemental damage up (XL) / HP down (L) |
| Appearances | SaGa Scarlet Grace Romancing SaGa Re;univerSe |
| Voice Actor | (JP) Yūko Kaida (EN) Jennifer Losi |
| Type | Playable |
- "I pray my little bit of assistance is enough to defeat the Firebringer."
- —Initial Quote
Sasha (サーシャ Sāsha?), whose real name appears to be Aleksandra (アレクサンドラ Arekusandora?), is a playable character in SaGa Scarlet Grace. She initially appears to be the living embodiment of the Sublime Spiritual of Unda, seeking for someone to help her in finding the Scarlet Shards. A character with an erratic background; her true identity is only disclosed through various pieces of dialogue across the game.
Profile[]
Appearance[]
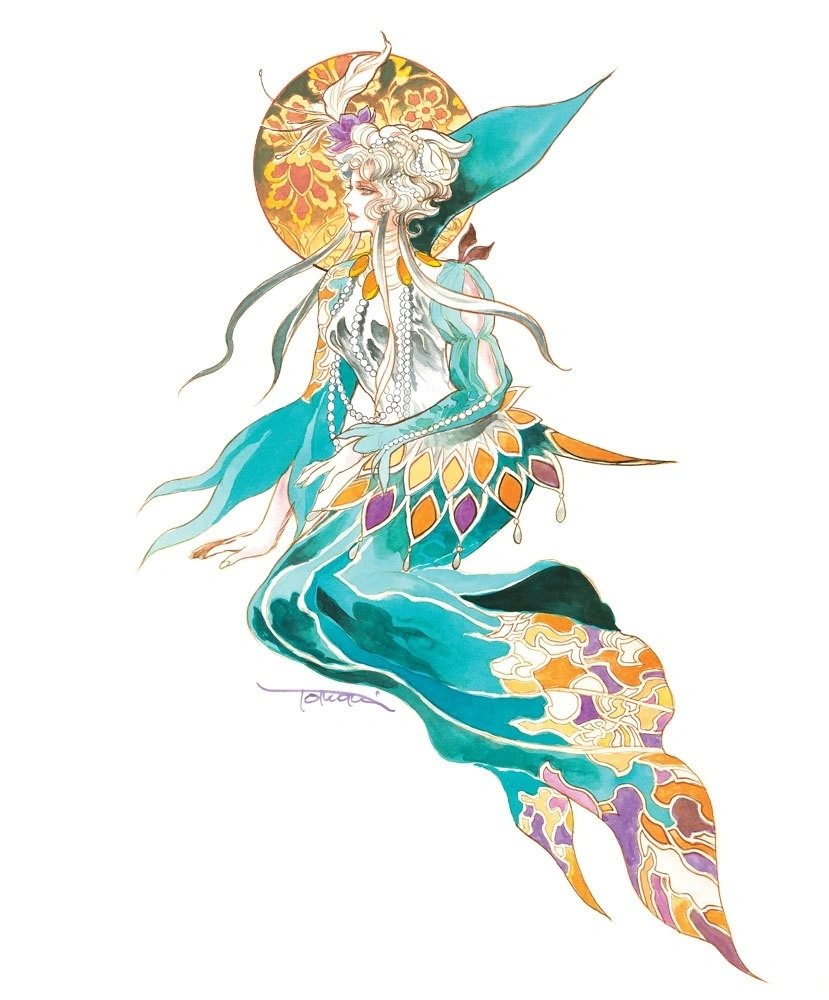
An odd-looking woman of highly pale skin and white hair; Sasha looks and dresses unlike any other person in the world. Her attire consists of blue garments with a notable flower-like motif present in her blouse and her pants. She's also seen wearing a leaf-shaped collar and purple lotus-like flower ornament in her hair.
Personality[]
Sasha appears to be a somewhat manipulative individual with no concept of remorse, and also one with a very short-tempered nature. Most of her interactions with the protagonists (except for Leonard) are rather hostile. All of this appears to be actually the behaviour of the Blackworm and not her own; when she's freed from the Blackworm's influence, her personality reverts to a more humble and friendly one, turning her into the complete opposite of the one she had as Sasha.
Story[]
Overview[]
Just as with Sigfrei, Sasha is a key character in the story, appearing as the main character of the Scarlet Shards scenario. She can be found in Marchiam Normi, Provincia Gradion or in Provincia Jusitania, looking for the protagonist's (except Leonard) help to find the Scarlet Shards to avoid the resurrection of the Firebringer. Sasha's interactions with the protagonists are oftenly hostile, as she is quite fond of ordering but also due her aggresive nature.
Urpina's Story[]
Sasha is seen wandering in some regions in search for someone to help her. She happens to run into Urpina, who after hearing about the danger the Scarlet Shards posed, joins her without a second thought. Their quest takes them throughout the world, with their interactions being of a more mentor-apprentice type, as Urpina learns to acknowledge her limits while Sasha learns to value freedom and also how to properly treat people.
Depending on when the scenario is played either Sasha will end the quest as usual by trying to destroy the protagonist's (Urpina) heirloom, or...
If the scenario is played during the endgame, Sasha guides Urpina through all the world, and the scenario has several notable points with some depending on several choices.
During the retrieval of Provincia Jusitania's Shard: Their quest takes them to the Spira Tower, where Urpina witnesses the power of an old Infernal relic called the Eye of Balor. Here Urpina learns to acknowledge her limits, as despite how dangerous was to leave the relic there, Urpina knows that risking her life for such a trivial matter wouldn't yield anything good. Nevertheless, Urpina rushes into capturing the eye; a quite rash thing as said by Sasha.
During the retrieval of Marchiam Normi's Shard: Their quest takes them to several places, with the shard being found at the hands of a frozen thief outside Westdorf. After finding the shard, the group is approached by an imperial librarian who convinces Urpina to take the stone to the Tidemarch in order to witness the extent of its power. This enrages Sasha, as a curious Urpina visits the mountain where she witnesses the parting of the North Sea. The North Sea reveals the ruins of an old observatory which causes even more curiosity to Urpina and even more rage to Sasha who just wishes to destroy the stone.
If Elysed was recruited and is one of the most used units: Their quest takes them to Marchiam Megdasse where King Adill tricks Urpina into illuminating the glyphs in exchange for his Scarlet Shard. Just after illuminating the glyph of Aranea, Sasha and Urpina are confronted by Adill who tries to recruit Urpina into his mission of creating a new empire. If Urpina accepts his request, an enraged Sasha tries eliminating the "traitorous" Urpina by turning into the Blackworm, but she falls to Urpina's blade, putting the Sublime Spiritual to rest at last. However, if Urpina declines Adill's request, the Walomir king runs away with the Scarlet Shard, leaving a frustrated Sasha swearing revenge on the ambitious man.
Their quest later takes them to Provincia Hibernia, where the Scarlet Shard was found earlier by someone else who split the stone into three fragments that were given to the branching houses of House Gwynese. Soon after reuniting the fragments by Lord Gwynese's request, Elysed departs to help her father in the summoning of the Sublime Spiritual. Urpina chases her and knocks into her some conscience. Following the battle, Elysed ends heavily wounded and succumbs, while Sasha only comments on the foolishness of her acts. Suddenly Urpina's Ibex Ring glows and grants Elysed new life, leaving Sasha perplexed as the thing that tied her to Urpina had been lost. Intending to leave Urpina, Sasha tells her that without the ring her fate has changed and that she should just return to Silmium to live her days in peace. However, Urpina refuses and insists on continuing their quest, and so Sasha tells her that they must go to Ei-Hanum.
- "The time has come. I trust your spirit will remain strong to the very end."
- —Final Quote
After traversing the underground waterway of Urbs Azhuacan and arriving to the Central Palace, Sasha tells Urpina more of her original plan: she was to use the ibex Ring to lure the Firebringer and then use Urpina and her retinue to defeat him in order to end his interference in the world. She was sure the power of the ring would be enough to let Urpina and her party to hold their own with the old god, but as the ring was destroyed then she was no longer sure how things would go on now. The group eventually depart to the ancient city and battle the old god, emerging victorious, while Sasha feels relief at last now that she wasn't bound to any sort of destiny. Thanking Urpina for her help for the first time ever, Sasha departs, claiming that if she's ever to be seen again, it won't be her but rather a different person.
Ending - The Wanderer[]
| Urpina's Story | Whether Sasha was a Spiritual or simply possessed by one is a question that can no longer be answered. However, sightings of a woman in odd dress continued to be reported far and wide for many years to come. |
Leonard's Story[]
Finishing his harvest, Leonard finds a badly-injured Sasha wandering near his farm. The woman barely tells him to "go drown the Scarlet Shards in Ei-Hanum" and then collapses. Following the incident, Leonard takes her to Doc Rogers' clinic and decides to complete the mission in her place. Sasha takes a while to recover and sometime later after Leonard's visit to the Northeast Boundary, she appears to recover but according to Doc, she appeared to be in a trance-like state, refusing to eat or drink. Sasha wouldn't appear again until Leonard drowns the Scarlet Shards in Ei-Hanum and beats up the Firebringer. Sometime after this, the woman had recovered from her trance and started acting more normally, growing more fond of her carer and eventually marrying him. As a whole year passes by, Leonard decides to pay them a visit and finds Sasha fully recovered, though apparently without remembering anything about the Scarlet Shards or about her original self.
Balmaint's Story[]
Sasha briefly appears during Balmaint's story when he and Arthur are either on break or detouring. She can be found as usual in Marchiam Normi, or in Provincia Jusitania, asking for help as usual. However, the quest ends much different, as Sasha asks Balmaint to hand over Sigfrei's Pendant as it was another of the Scarlet Shards. Balmaint absolutely refuses, saying he has no right to do whatever he wants with things that have been entrusted to him. Taking no for answer, Sasha transforms into the Blackworm and battles Balmaint's party for the pendant. She's defeated and so the Blackworm vanishes, never to be seen again.
Taria's Story[]
Sasha appears as usual looking for help in destroying the Scarlet Shards. Her interactions with Taria are even more hostile, as both usually clash due their passive-aggressive behaviour. Nevertheless, both end up cooperating as Taria was interested in seeing how she would be able to destroy the supposedly unbreakable stones. Depending on the time of the scenario, Sasha sticks with her group and their adventure leads them to Ei-Hanum where she reveals the whole point of her mission: guide someone to the Firebringer in order to cut the link between the old god and mankind. Lastly, she also reveals that she was being used as a vessel for the Blackworm to establish contact with the humans.
However if the scenario was played early, at the end Sasha thanks Taria for her aid but before leaving, Kahn asks her to stay with the group instead. Saying that the Spiritual balance has been restored, she'll no longer be Sasha and instead be a normal human. Kahn doesn't really care about this and insists on having her to stay with them and then...
Aleksandra[]
- "Without the power of the Spirituals, I'm just an ordinary woman who probably won't be much help."
- —Initial Quote
Sasha joins the group but with another name: Aleksandra. Her stats are slightly lowered, meaning that it was the Blackworm's power what gave her the ridiculous stats when she's recruited in Urpina's story. Being a complete reverse to what Sasha was, Aleksandra is a more humble and rather insecure woman, oftenly commenting on how little of help her skills are. Soon after the Firebringer is defeated, Aleksandra stays with Kahn and the Killers; but to their dismay, the Killers soon leave the two as the only members of the group, likely intending for Kahn to finally settle with someone.
- "I had a GREAT time! And I know I'm useless, but please let me tag along till the end! Pleeease?"
- —Final Quote
Ending - Killer Traveller[]
| Taria's Story | Sasha joined the Killers at Kahn's invitation―at which point all the other members promptly quit. Is it perhaps too much to assume that they did so to give Kahn a better chance at love? Alas if so, for no tales have ever been told of the two growing particularly close. |
Gameplay[]
Stats[]
| Character | Sasha | Alexandra |
| Element | Unda | |
| Default weapon | Staff | |
| LP | 8 | 8 |
| Strength | 10 | 8 |
| Dexterity | 12 | 10 |
| Mobility | 10 | 8 |
| Endurance | 9 | 7 |
| Intelligence | 16 | 14 |
| Acuity | 14 | 12 |
| Formation | Poison Pill | |
Recruitment[]
Sasha is recruitable in Urpina's scenario, while Alexandra is recruitable in Taria's scenario.
For Sasha: Sasha's recruitment is a tedious process that first requires having Elysed in the party, while having her being one of the most used units by the player. The Walomir glyph must not be illuminated yet during the Second Scenario. After completing the Second Scenario, the Third Scenario has to be Scarlet Shards. If Elysed has been tagged as one of the most used units in the retinue, then Provincia Hibernia will remain locked for a while. After this, to gain access the player will have to gather ALL the other Scarlet Shards (Gradion, Bicyniro, Cerenaif, Northeast Boundary, Normi, Jusitania, Numadica, Megdasse). During the retrieval of Marchiam Megdasse's Shard, the player must choose not to ally with Adill. After this, Hibernia will be unlocked, and after the events there, Sasha will be recruitable in Urbs Azhuacan, moments before making the choice to travel to Ei-Hanum.
For Aleksandra: Aleksandra can be easily recruited at the end of the Second Scenario version of Scarlet Shards. The player will be given the choice to either take her or not.
Performance[]
With an INT value of 16/14 and a unique role that highly boosts her damage, Sasha is very comparable to the deadly Killers such as Queen or Tomato with their XL damage boosting roles. Her only weakness is her availability, especially when she's recruited as Sasha. Still, having a mage that is able to easily dish absurd amounts of damage or heal large amounts of HP, results very helpful for the endgame content such as the Scarlet Fiends, despite the HP reduction of the role.
Other Appearances[]
Romancing SaGa Re;univerSe[]
Sasha appeared as a free limited unit obtainable through the "Battle with Blackworm" event's exchange shop, getting some reruns over the time as a random drop in some events. As with most old free units, her performance is verily mediocre nowadays.
In the global release, Sasha has received an exclusive alternate style for its one and a half anniversary during December of 2021, which is heavily focused on assisting her allies through party-wide heals, debuff cleansing and WIL/INT debuffing. However, just like her original version, this one has slightly fallen to disuse as more versatile units filling the same niche have been released such as Christmas Princess White Rose, SS Mariah, ITOKEN, just to name a few.
Gallery[]
")
")
")
")
Gallery[]
")
")
")
Trivia[]
- Sasha/Aleksandra's unique role original name (大精霊の器) makes it even clearer that Sasha has always been the name of the alter-ego taken by the Blackworm.
- Aleksandra has a unique quote for when Kahn gets seriously wounded in battle; exclaiming his name in a worried tone.
- Originally Sasha had her Snowstorm incantation at Rank 3. This was changed for the re-release as part of the rebalancing changes.
- In Leonard's story, a legend told by Roh Sung sort of implies that Sasha may have initially lived in Ei-Hanum. Hence the reason of her oddly pale skin.
[]
 | ||||||||||||||||||||||||||||||||||||||||||||||||||||||
|---|---|---|---|---|---|---|---|---|---|---|---|---|---|---|---|---|---|---|---|---|---|---|---|---|---|---|---|---|---|---|---|---|---|---|---|---|---|---|---|---|---|---|---|---|---|---|---|---|---|---|---|---|---|---|
| ||||||||||||||||||||||||||||||||||||||||||||||||||||||