| SaGa Scarlet Grace character | |
|---|---|
| レオナルド (Reonarudo?) | |
 | |
| Portrait | 
|
| Gender | Male |
| Race | Human |
| Class | Farmer |
| Initial Role | Cannonball: Initial Position up (L) / Chance to be targeted up (M) |
| Appearances | SaGa Scarlet Grace Imperial SaGa Imperial SaGa: Eclipse Romancing SaGa Re;univerSe |
| Voice Actor | Yūma Uchida Max Mittelman |
| Type | Playable |
- "I'll need to grow up fast if i'm gonna drown the Scarlet Shards in Ei-Hanum."
- —Initial Quote
Leonard (レオナルド Reonarudo?), also known as Leo (レオ Reo?), is one of the main protagonists in SaGa Scarlet Grace. Living in Marchiam Yaxart, Leonard works tirelessly as a farmer ever since his grandfather died[1]. Having never set foot outside his home, his life takes a major turn once he meets an odd-looking woman. Leonard then departs on a journey accompanied by his lifelong friend Elisabeth to uncover the truth of the world.
Unlike other protagonists, Leonard is said to have been born holding a Scarlet Shard, which in turn might imply he's somehow a possible incarnation of the Firebringer, just as its said to be the case of the baby found in Provincia Gradion. No matter its significance, Leonard keeps living his life as usual.
Profile[]
Appearance[]
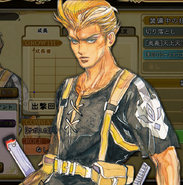
Leonard has large blonde hair, with a spiky bunch to his right side. He wears a black shirt, a utility belt, beige pants with black markings, and black shoes with yellow buckles.
Personality[]
- "Your typical tough guy, Leonard is a man who prefects action to words. Those not put off by his harsh demeanor find themselves with a staunch ally through thick and thin."
- —In-game description
Known for being a rather troublesome kid, Leonard began maturing once his grandfather died. Ever since, Leonard is mostly seen as a somewhat grumpy and stern man of great resolve, choosing only to act when it's needed, and acting in the straightest way if possible, which is something that has gotten him into more than one fight. His serious demeanor is something that has given him a unique perception of the world, making him be able to see through not-so-evident things such as when he deduced that all the stories portraying Ei-Hanum were made just to cover the truth about the world.
Story[]
Prologue[]

Departure
Annuncia Farm, Provincia Yaxart. A vast sunset can be seen across the vast prairies of the land. Here lives a young man named Leonard who's just finished a harvest, being sure he'll be the chosen top dog amongst all other farms at Yaxart. Suddenly he comes across a woman wearing unusual clothes who barely mutters him to "drown the Scarlet Shards in Ei-Hanum" before collapsing. The woman is taken to a nearby clinic where the doctor tells Leonard it will be some time before she recovers. Leonard resolves to take her mission in his stead, thinking the woman had "chosen" him to find the mythical land of Ei-Hanum. The doctor suggests Leonard to visit the Imperial Library at Azhuacan and then wishes him luck on his journey. Leonard redies to depart from his homeland, a thing he's never done before, but is approached by his friend Elisabeth who forces herself to accompany him alongside her retainers. More than ready, for the first time ever, Leonard departs from his homeland, onwards to find the land whose name has been forgotten by the annals of history.
Midgame[]
Onwards to Azhuacan, the group experiences all sorts of oddities such as meeting Sigfrei, who was suppossed to be already dead by then; or the offensive of Elisabeth's favorite Spiritual: the Earth Serpent, and its golems; or even, the apparition of the elusive flaming chicken known as the Phoenix. Whatever else may have happened, Leonard's objective never changed and he soon became involved in reuniting the missing Scarlet Shards across the world. After getting to Azhuacan and failling to find information about Ei-Hanum, Leonard is told to search for answers in the Northeast Boundary, as there laid an enormous lake which could possibly have something to do with Ei-Hanum. Leonard departs from the Imperial city and yet again witnesses the oddities of his world, such as meeting a churro vendor struck by divine inspiration or watching how the Phoenix made a horror show within something that was already one. Having said that, Leonard arrives to the northeastern limits of the world, a cold place where people had gathered to strike it rich after the Empire crumbled to ashes. There he had found the rumoured lake, where he tried to fulfill his task of drowning his gathered Scarlet Shards. To his surprise, naught happened as the stones simply sank to the bottom; and yet as futile it seemed, something had emerged from the lake: an image resembling himself. The image told him the truth of the world, telling him that what was visible was simply a part of a greater land, The lake wasn't Ei-Hanum after all, and Leonard deduced that the mythical city had to be somewhere outside the visible remains of the Empire. The figure returned him the red stones and departed, while Leonard resolved to return to the imperial city to complete his mission.
Endgame[]
Returning to the old imperial capital, Leonard visits the Imperial Library to report of his findings to the librarian who had told him to search for answers in the Northeast Boundary. Wondering if Leonard had already found the whereabouts of Ei-Hanum, the librarian ask him of how has his quest progressed. Leonard answers by saying the city was apparently right beneath Azhuacan and that he was sure the librarian knew of a way of getting there. Annoyed, the librarian reveals to Leonard that Ei-Hanum is a place where one could attain the power to rival the gods and become an emperor of men; although after witnessing Leonard's behaviour, she was sure to never let him travel there, as he would become another false emperor of ruin. Caring not about becoming an emperor or leading an empire, Leonard forcefully pushes through the librarian and reaches the underground part of Azhuacan. A sight to behold, the underground was larger than expected, being an enormous abyss that had to lead somewhere. Sitting on the center was a light that guided Leonard to the Central Palace. At last in the center of the world, Leonard and Elisabeth have a recollection of all their adventures and proceed to walk the stairs that lead to the Central Palace where someone was awaiting for them. Seeing nothing out of the usual, the Central Palace was apparently only another of the many temples of Azhuacan. However, there was someone eagerly awaiting for Leonard's arrival... Sigfrei soon makes appearance and offers Leonard to help in finding a way to Ei-Hanum, yet he attacks him for no reason. Clearly upset, Leonard fights back and defeats him without much effort; yet Sigfrei leaves the scene without leaving any trace. The palace starts descending and soon makes a stop to somewhere in the depths of the imperial city.
- "Is this really Ei-Hanum? Man, I kinda expected a little more. But yeah, all right... let's get this over with."
- —Final Quote
At last, Leonard had arrived to the remains of the mythical city of Ei-Hanum, where on its center stood a ghouly lake of light. Ready to drown the Scarlet Shards, Elisabeth stops Leonard to make a wish in his place, as he had nothing really in mind. After drowning the first set of shards, the Firebringer suddenly emerges and attacks Leonard's party. The old god somehow had revived, while Leonard deduced that the shards might have given him power to allow that. Oddly attacking with copies of the benisons of the other Celestials, the Firebringer is pushed back, which allows Leonard to drown the other shards he had. Not long after, the Firebringer recovers from his defeat and fights back but he is likewise defeated. With only a few shards remaining to be drown, the Firebringer prepares to annihilate Leonard and begins to turn into a comet. The whole place is illuminated by a fiery light and Leonard and his party find themselves fighting within the starry sky of the world. After a harsh battle, the Firebringer is defeated and explodes into a newer set of Scarlet Shards, while Leonard is presented the Scarlet Grace. Having fulfilled his task, Leonard simply grabs the Scarlet Grace and throws it away, and finally makes a return to home.
Ending - Nothing Ever Changes[]
Some time later, a less stern Leonard finishes his harvest with the help of some of his friends and comes out as the top dog of the year. Paying a visit to Doctor Rogers, he finds that the woman of the Scarlet Shards has fully recovered and has even become the wife of the doctor! Remembering nothing of her past, the woman thanks Leonard for his help. Leonard leaves and wonders if something has really changed after his journey. On the distance, Elisabeth is seen coming for a visit after a long while. Telling Leonard that she could only come after accepting to find a suitor to get married, as ordered by her father; Elisabeth thanks Leonard for the journey they had and then...
Outcome A[]
How to get: Wish for no strong enemies to attack
Elisabeth says that she's had enough adventures for her lifetime and that she will treasure those memories. She thanks Leonard for all and then departs. Feeling that nothing has really changed, Leonard prepares to continue to work on his farm... Until the one who's passed the most time by his side arrives and follows him. Be it a noble from the world, an oddball, or even a witch, Leonard was sure bound to live through another great adventure.
Outcome B[]
How to get: Let Elisabeth wish to stay by Leonard's side; or let Elisabeth be the most used ally in battles
Annoyed by her father's wishes, Elisabeth asks Leonard to escape and live another adventure. However, reaffirming that he has grown up, Leonard tells her that adults don't run away from their problems and then... Proposes to visit Mr. Addams, the true final boss, but this time as his daughter's suitor. Rather unsure of how things would go, Elisabeth tells that he may not even come out of this alive; Leonard tells her that he's gone through harsher things and that he'll be alright and figure out things, with Elisabeth by his side.
Other Stories - The Same as Ever[]
| Other Stories | Leonard returned to Marchiam Yaxart and married the daughter of a local landowner before becoming one of the most powerful and influential people in the area. He remains the same as ever, however, bringing headaches and smiles to all in equal measure. |
Gameplay[]
Stats[]
| God | None | Imhokiel | Astel | Bartlett | Balor |
| Element | Sturna | Sturna | Jutris | Vencia | Consturn |
| HP | 77 | 87 | 87 | 67 | 77 |
| LP | 10 | 12 | 12 | 8 | 4 |
| STR | 13 | 15 | 13 | 11 | 13 |
| SKL | 7 | 7 | 5 | 7 | 11 |
| MOB | 9 | 7 | 9 | 11 | 9 |
| DEF | 13 | 15 | 13 | 13 | 12 |
| INT | 5 | 3 | 5 | 8 | 7 |
| CON | 12 | 12 | 14 | 12 | 12 |
The leftmost stats are Leonard's default stats. Balor's constellation will only start to appear after a sixth playthrough.
Recruitment[]
Leonard can be recruited in the other stories after Marchiam Yaxart becomes accessible. To recruit Leonard one must simply complete the common shrine pilgrimage and visit Rowsui. Leonard will request to accompany you, to which you can agree or not.
Performance[]
Leonard's stats and role make him a very versatile unit in combat. Though the most recommended role in-combat is for him to act as a protector, which he simply excels at, unlike any other character of his class. As with other protagonists, Leonard is able to quickly develop any skill proficiencies without much problem, which paired with his fast HP growth make him a very reliable unit to recruit, if one intends to tackle major challenges such as the Scarlet Fiends.
Other appearances[]
Imperial SaGa[]
Leonard appears as an obtainable character.
Imperial SaGa: Eclipse[]
Leonard appears as an obtainable unit.
Romancing SaGa Re;univerSe[]
Leonard appears as an obtainable character through the Platinum pool, having received a limited version for an event related to the Chinese new year and also a limited exclusive version for the global release.
Gallery[]
Trivia[]
- Under Imhokiel's constellation, Leonard has the lowest intelligence out of all the characters in the game, at 3 points.
References[]
[]
 | ||||||||||||||||||||||||||||||||||||||||||||||||||||||
|---|---|---|---|---|---|---|---|---|---|---|---|---|---|---|---|---|---|---|---|---|---|---|---|---|---|---|---|---|---|---|---|---|---|---|---|---|---|---|---|---|---|---|---|---|---|---|---|---|---|---|---|---|---|---|
| ||||||||||||||||||||||||||||||||||||||||||||||||||||||

